
Start Streaming on Twitch
Everyone wants to be a streamer, but nobody knows where to start. This page serves as a detailed, step-by-step guide on how to stream your gameplay as a beginner. We’ll show you how to take your stream from a dark and sad monologue into a true production. This includes Twitch account creation, utilizing OBS, creating scenes and overlays, and more. Get started or jump ahead by clicking the section headers below.
Create your Twitch Account
- Go to https://www.twitch.tv/ and create an account for yourself.
Download / Install Streamlabs OBS and Connect to Twitch
- Go to https://streamlabs.com/streamlabs-obs/ and click the “Download Streamlabs” button.
- Run the Streamlabs OBS Setup exe file.
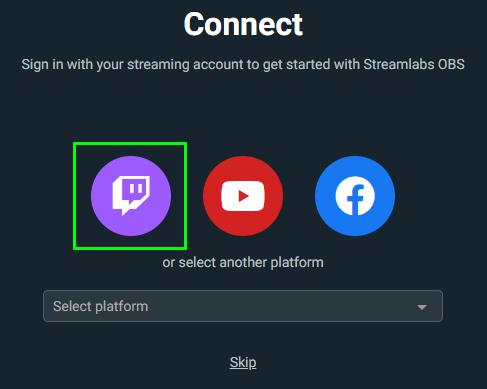
- Once Streamlabs OBS launches, click on the Twitch icon.
- In the “Log in to Twitch” pop-up, enter your login that you just created and click “Log In”. You might get prompted to enter an authentication token.
- After you login, click “Authorize” so that Streamlabs can connect to your Twitch account and make things much easier.
- Choose your Streamlabs plan. I would recommend clicking the “Choose Starter” button here while you get started, because you can always add Prime later if you want.
- Click “Start Fresh”.
Initial Setup of Streamlabs OBS
- Set Up Mic and Webcam. If you have a webcam already plugged in, you should see yourself in this section by default.
- Add a Theme. This can be a quick way to get started on a theme. It isn’t necessary from the start, as you can build your own over time, but to quickly and easily get started you can choose one from here.
If you want to pick one of these Themes, choose one you like, then click Install.
If you want to find a different theme or make one for yourself, click Skip. - Optimize. Twitch will analyze your internet speed and computer hardware and adjust your settings accordingly. Just click “Start”.
a. The first section is where you select your Webcam. As long as you’ve only got one camera, this shouldn’t need changed. If you have more than one Camera, select the one you want to be using.
b. The second section you should leave on “None”.
c. The third section is for your Mic. Click that section and it will open a list of Microphones you can use. There will probably be options for your Webcam’s mic, your Headset’s mic, and your stand-alone mic. If you’ve got a stand-alone mic (assuming that’s the best quality mic you have), select that one.
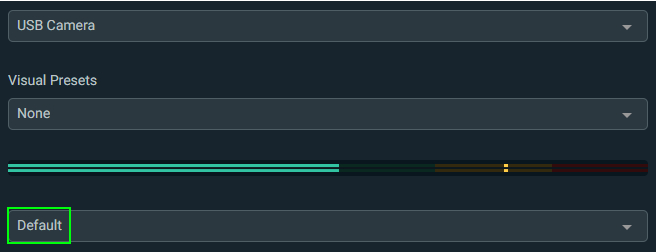
d. Once all setup, click Continue on the bottom-right.
Setup your Scenes and Sources
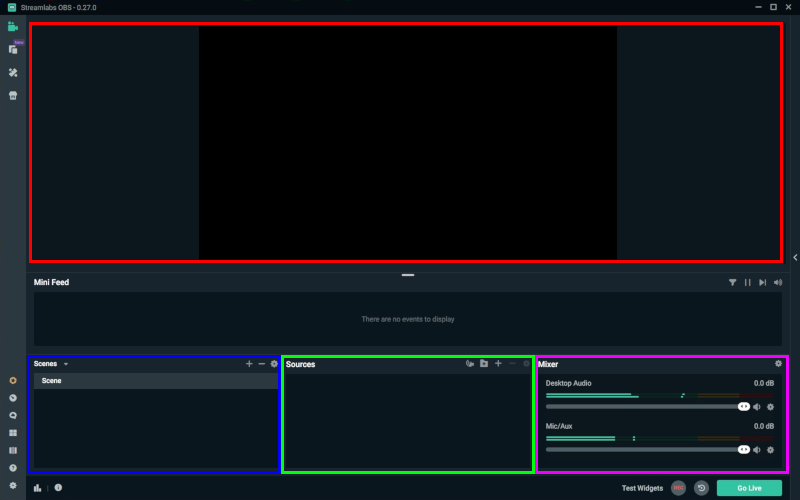
Once your initial setup is complete in Streamlabs, you will need to add Scenes and Sources then also make adjustments in your Live View and Mixer sections. I have color coded each of these sections for reference, in the image below.
Live View Scenes Sources Mixer
Live View - This section gives a live look at what you will be recording or broadcasting. Here you can adjust sizes of various Scenes and move them around to place them where you want them to fit. It will remain empty until you have created at least one Scene with Sources in it.
Scenes - These are where we will start building our stream layout. Each scene will contain one or more Sources inside of it. You can switch between Scenes during your broadcast by clicking them.
Sources - Sources are each of the individual elements that we want to display on our broadcast. This is the area that you will be doing most of the work in.
Mixer - This controls your audio levels. You will want to adjust levels so that your voice can be heard over the game volume but also adjust them so that you dont go into the Yellow and Red sections of the volume bar’s too much. This can cause your audio to sound bad (clipping).
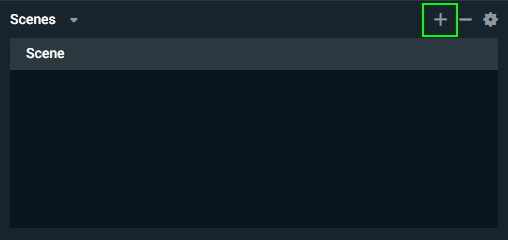
- Let’s start building out our laying by adding our first Scene. In the bottom left section, where it says “Scenes” click the + icon.
- Let's title this Scene "Master". This will be our main scene where we will setup the following sources:
- Let's now add our first Source within the Master scene. Something to note is that whenever you add or edit a Source, it lives within the Source that you have clicked.
So for this first Source we need to make sure that the "Master" scene is selected before we add a scene.
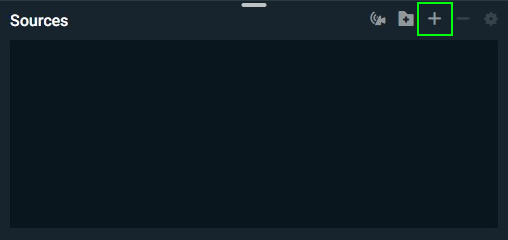
With the Master scene selected, we can go over to the Sources section and click the + icon. - A window will pop-up with a ton of options, Standard and Widgets. For this first one look within the Standard options and click “Display Capture” then click “Add Source”. Leave the default name of “Display Capture” and click “Add Source”.
- The primary monitor that you are using should be selected by default. This is probably the correct display to capture, considering it is also the display that your games will launch on. Leave "Capture Cursor" clicked as well and click “Done”.
You should now see your Desktop being displayed up in the Live View window. Now this is where we will want to add a "Game Capture" to sit on-top of the Display Capture.
Note that the order that your Sources are listed will determine how they are seen. Sources listed higher up on the list will show up over-top the Sources listed below it. For now it doesn't matter too much, but we will go over this again later after we have added all of our Sources. - While the Master Scene is still selected, click the + icon again in the Sources section. In the pop-up window click “Game Capture”, then click “Add Source”. The default title of "Game Capture" is fine, click “Add Source”.
- On the Mode selector, I like to have it so that if I'm streaming but don't have a game launched, the viewer can see my desktop instead. If you would like this, then change the top option from "Auto" to "Capture and fullscreen application". The rest of the settings can be left as default. Click “Done”.
- Now let's add our Camera into the mix. Again, making sure the Master scene is still selected, click the + icon in the Sources section. This time in the pop-up window, under the Standard options section, click “Video Capture Device” then click “Add Source”. Here I would change the title from “Video Capture Device” to “Webcam”. Click “Add Source”.
- By default, the camera you setup earlier should be used here, and you should see the live video feed at the Preview window up top if it's working correctly. All of the default settings should be fine except for the very last setting, “Use custom audio device”.
We want to check that box then make sure that our stand-alone mic is selected in the drop-down box that appears under the checkbox we just clicked. Once selected, click “Done”. - At this point you probably now see the video as full screen in the Live View window at the top. We will resize this along with the rest of our scenes later on. For now we can proceed to getting the next Scene.
Again while we are still working within the Master scene, let's go ahead and click the + icon on Sources again. This time we will want to be looking within the Widgets section. Click “Alertbox” at the top-left of the options and click “Add Source”. Leave the default name of “Alertbox” and click “Add Source”. - There are a lot of customization options here. You can leave them default if you would like, but you should at least look at switching out the Animation that plays when any of the actions on the left panel occur during your stream.
Let’s do the first one, and you can repeat this process for the rest of the options along the left-panel. So click on the top option, “Bits”.
Now on the right side panel, under “Sources and Settings” click “Media”.
You should now see an animation of a Zombie running along. Streamlabs has a library of animations that you can choose from if you want to swap the Zombie out with something else.
To do this, click “Change Media”. You can upload your own animation here, but for this tutorial we will just grab a new one from their Stock Files. So on the left side of the pop-up window, under “Stock Files”, click “Images”. Scroll through the list of images until you find one you like. Once you have, click on the image then click “Done”.
If you want to change out the sound that plays during the same action, you can follow the same steps as above except click “Change Media” under the “Sound File” section. - Once you are happy with your Media selections for when someone gives you Bits in your stream, you can repeat this same process with the other actions along the left.
Click the - icon to the left of “Bits” to minimize that section and see the full list of actions again.
You can go through and make changes to each of these actions following the steps from #11 above. I typically just make each action use the same Image and Sound.
Once all of your Alertbox settings are how you want them, click “Done” in the bottom-right. - Ok now let’s add one last widget. So once more while within the Master scene, click the + icon on the Sources section. This time we are going to click “Event List” under the Widgets section, then click “Add Source”. You can leave the default name of “Event List” and click “Add Source”.
- Since you are just starting streaming, I would go ahead and click the “Follows” checkbox. Since we can’t receive subscriptions until we reach Twitch Affiliate, we will want to recognize the people who help us early-on, our Followers.
- Depending on how much room on your screen you want this section to use, you can move “Max Events” up or down. I would suggest going with either 3 or 4. Any more than that will probably take up a bit too much room.
- You can adjust your Font and Visual settings if you want from the list on the top-right. Under Visual Settings you can customize the background pattern by changing the “Theme”. You can also adjust the colors and the animation effects. I would go with a theme and color scheme that matches colors that you would like to use elsewhere on your stream. For example if you choose green here, you will probably want to use that same color green in your Twitch Profile settings later on.
Once you are happy with your settings, you can click “Done” in the bottom-right corner. - Ok these 5 sources we have created can now be adjusted. Click on each Source in our list to see where it’s going to be displayed on our screen and how big or small it is. There will be a green box around each one. This green box can be dragged into different areas and also resize by clicking and dragging the white boxes along the border of the green box.
Let’s start by adjusting our “Webcam” source. Click on “Webcam” in the Sources list. Now click and hold on the white box at the top-right of the green box. Drag your mouse down and to the left until you reach the size you want your Camera to be.
I left my Webcam source located in the bottom left corner, but you can click and hold the middle of that green box and slide it elsewhere on the screen. - You can repeat this process for your “Event List” and “Alertbox” Sources. I shrunk them both a bit and moved my Alertbox to the top-mddle and the Event List to the bottom-right.
All of these Scenes can be resized and moved at any time, even during your stream. Sometimes you will need to move things around so that they don’t cover up important areas of the screen. For example if you want viewers to be able to see your healthbar, or the mini-map, you will need to move Scenes around so that they don’t cover them up.
Don’t worry if your Event List and Alertbox scenes aren’t displaying anything, because if you have no followers yet, your Event List will be empty, and your Alertbox will only display things for a few seconds when any Alert action occurs. - Now the last thing we need to do for now in our Sources section is to make sure that we have them ordered in a way that everything will be visible. From top-to-bottom, my list is as follows: Event List, Alertbox, Webcam, Game Capture and Display Capture. It looks like this on my Streamlabs.
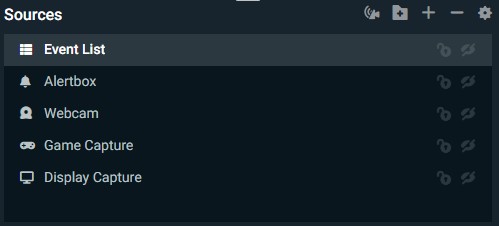
One last thing to note about your Sources is the little Eye icon along the very right of each Source. The way they are now, each of the scenes are visible. If you click the Eye icon on any Scene, it will become hidden, making it not visible to the viewers. When a scene is hidden, the icon will be an Eye with a line through it.
 This source is Visible
 This source is Hidden
There are probably many reasons why you might want to Hide a source, but the most common one is if you are entering Credit Card information to buy something in a game. Before I go to purchase anything, I will Hide both my Game Capture and Desktop Capture Sources. To confirm they are Hidden, you can look at the Live View section and you should see a black screen. - One last task to perform here in Streamlabs OBS now and it’s adjusting our volume levels. We want to launch a game or some audio on our computer so that we can see our “Mixer” in Streamlabs OBS is receiving Desktop Audio.
Adjust that slider bar below “Desktop Audio” so that it only goes to about halfway at the highest on the bar. We don’t want the audio going up into the yellow. This will take some adjusting as you play different games, since they will all have separate volume levels.
Now speak so that your Mic can pick up your voice. You should see the “Mic/Aux” volume bar move when you speak. Adjust that volume so that it is louder than your Desktop Audio, but also not going into the yellow.
This will take some testing and it’s something you will need to adjust over time. If you want to get the levels right before you Go Live, you can do some Test Recordings.
To start a recording, click the little button in the bottom-right of Streamlabs that says “REC”.

You can now play a game and talk during it, then once you want to end the recording click the same button.
Now you can watch that video and determine if you need to make anything louder or quieter in the Mixer. By default your video recordings should be saved under “This PC > Videos”.
◦ Display Capture
◦ Game Capture
◦ Player Cam
◦ Alert Box
◦ Live Events

Now that we’ve set up our Master Scene. Let’s quickly Setup a Scene for full screen Webcam.
- Go to the Scenes section and right-click the “Master” scene, then click “Duplicate”. Name this Scene whatever you want, for my example I titled it “Full Cam”. Click “Done”.
Now within the “Full Cam” scene we have all the Sources we just created, listed in the Full Cam scene. - With the “Full Cam” Scene selected, go over to the Sources and Remove both the “Game Capture” and “Display Capture” Sources. You can do this by right-clicking them and clicking Remove.
- Now click on the Webcam source so that you can see the green box around your Camera. “Click and hold on the white box on the upper right corner of the green box and drag to the upper right corner of the Live View screen and make your Camera full size.
You can move your Alertbox Source to another location on the screen so that it isn’t covering your face.
This should be all you need for your initial setup of Streamlabs OBS. Now we can move onto the final step, Personalizing your Twitch Profile.
Personalize your Twitch Profile
- Go to https://www.twitch.tv/ and login to your account.
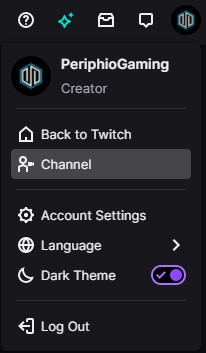
- Go to your User icon on the top-right of your browser and click your icon, then click “Creator Dashboard”.
- On the left-side panel, click “Preferences” then click “Channel”. If you don’t see a panel on the left side, click the three lines (hamburger) icon in the top-left corner of the screen to show the panel.
- Scroll down until you see “Profile Picture”. Click “Update Profile Picture” upload a picture to use as your logo.
- Under “Profile Banner” click “Custom Image” and click the “Upload” button. Choose an image to use and Upload it then click “Save”.
- Under “Profile Settings” go into “Display Name” and type in the name you want to be displayed on your Twitch Channel.
- Type up a Bio. Typically this should be a summary of games that you play and any other basic info about yourself. Click “Save Changes”.
- Go to the “Profile Accent Color” section. This is the place where you should use the same color that you chose for the background of your “Event List”. Choose your color and either the Light or Dark Theme then click “Save Changes”.
- Under “Video Player Banner” upload a background image that will display in place of your video player whenever you are offline. The image can say something like “Your Username is Offline” or “Stream Offline” with your social media information on it. It should be 1920 x 1080 resolution.
- Scroll down to “Social Links” and fill in all of them that apply. Click “Save” on each one after you’ve pasted your link in.
- Your settings should now be good. One last thing to explore is the “Extensions” section, on the left-panel. Here you can search a list of various Extensions that you can Install and Configure that will sit below your “About Us” page. You can Install as many Extensions as you want, but only 3 Extensions can be Activated at a time.
On our PeriphioGaming Twitch Account we have many Installed but only 2 are Active as seen below. - To get to your Channel’s About Us page, go to the top-right corner of the screen and click your Icon again. This time click “Channel” in the menu that pops-up.
- Now in the middle-left of your screen, click “About” located under your Twitch Username.
- Scroll down past your Bio and click the “Edit Panels” button on the left.
- You can now not only drag-and-drop your Extensions to place them in the order that you want them displayed, but you can also add as many Panels as you would like.
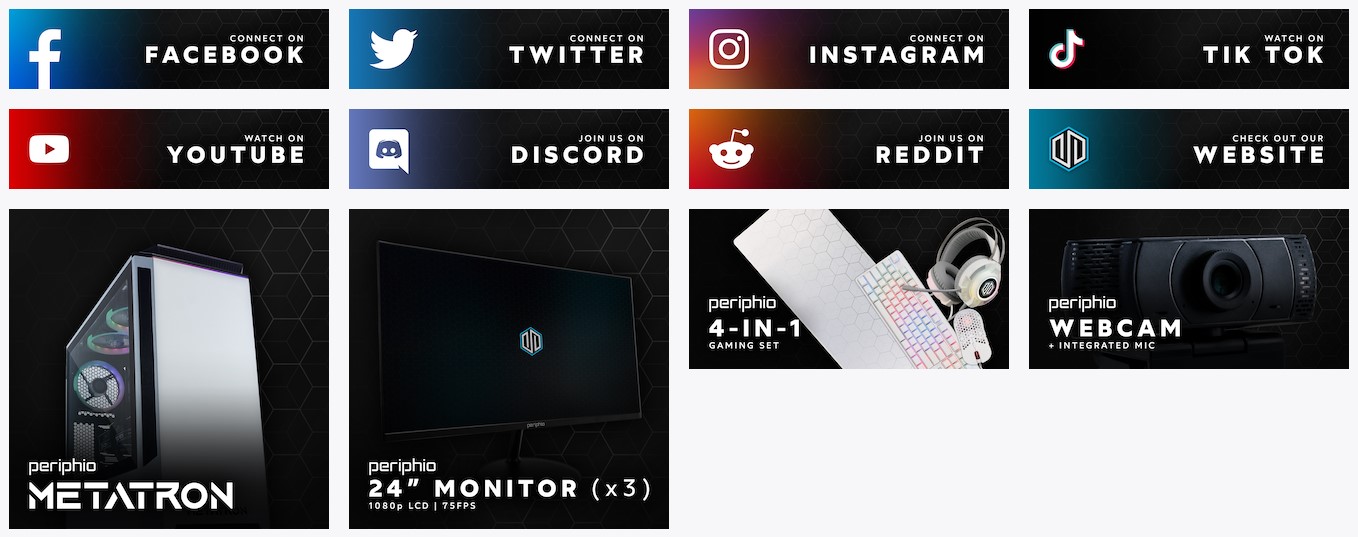
For PeriphioGaming we use Panels for a couple things.
- To showcase the Hardware that we use on our stream. So we have Panels for our PC, Monitors, Keyboard, Mouse, Headset, etc. These are all Images that we made and we have them linking to those products in our store.
- All of our Social Media accounts. We made button images for each Social Media platform and linked them to our various accounts.
To add a Panel click the grey box to the right with a big + sign on it. Now click “Add a Text or Image Panel”.
You can type in a “Panel Title” and a “Description”, but I typically don’t. Click the “Add Image” button to upload the image you want to use. You should make your image somewhere between 320 - 500 pixels wide. The images will scale to 320px, so anything above 500px would just add to page-load time and make no difference in how the page actually looks.
Drop a link in the “Image Links To:” text box then click “Submit” at the bottom-right.
Once you’ve added all the Panels you would like, you can drag-and-drop them to organize them. However, note that you are pretty limited on how these items will get positioned. Just mess around with them until you have everything laid out in an order that doesn’t look too bad.
Each time you want to Preview your work, you can click the “Edit Panels” button again.

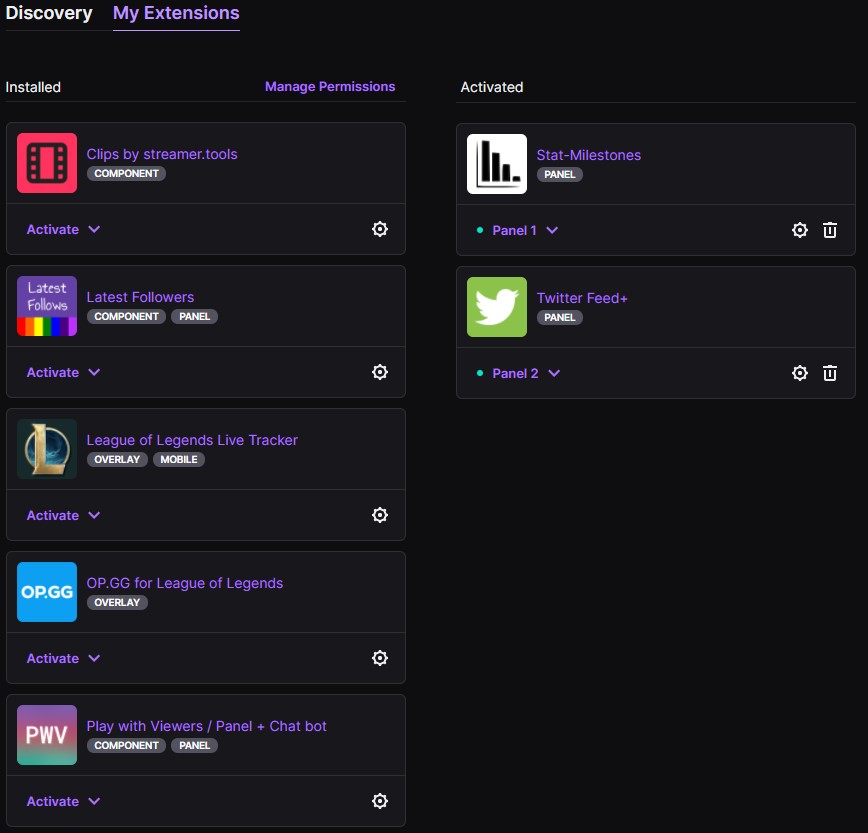
You can configure them here, as well as choose Panel 1, 2, or 3 for your Active Extensions. They can be configured further by going to your channel’s “About Us” page.
This concludes the tutorial on how to perform your Initial Setup to Stream on Twitch. There is obviously much more that can be done, but these steps should at least get you started on your way. If you would like to ask questions or join in on discussions, hop into our Discord and join the Periphio Community or come check out our Twitch Stream.